Friday, December 30, 2011

I'm a Lucky Girl!

Oh my gracious, how lucky I am!  I was thrilled to learn that I won the beautiful blog candy offered by Connie on her blog, Wax Beach Artist.  I admired the wonderful hand-made box when I saw it on her blog, but let me tell ya, in real life, it is out of this world gorgeous! 

Her package arrived beautifully decorated on the outside, with stamps, vintage images, and fun tapes!  I opened it up to find the gorgeous box and this wonderful vintage style tag.


Wow!  Then I open the box to reveal this beautiful seaside image on the inside lid.....

What a marvelous, serene landscape.  So beautiful.  And the fun didn't stop there, because stuffed inside was more fun....
Seashells, glass beads, flowers, lace, and wonderful coppery trim that already has me thinking of sea coral and mermaids and wonderful summery projects!  Connie, YOU ROCK!!!  Thank you so very, very much!  What a delight to receive your gorgeous artwork.

Happy New Year, everyone!  We will be sound asleep as the new year rolls in, trying to get lots of rest for our marathon volleyball tournament weekend!  Wouldn't have it any other way. ;)

Thursday, December 29, 2011

Mother-Daughter Art Day

Hello friends!  I hope you are all enjoying your holidays.  We had a wonderful, peaceful Christmas with family, and are having a fun week.  Ever since I went to a weekend with Donna Downey at her studio near Charlotte, NC, I've been wanting to try my hand at a canvas, a la Donna's Inspiration Wednesday videos.  My daughter really wanted to join in the fun, so we bought ourselves some blank, pre-gessoed canvases, watched some videos, and played for the entire afternoon in my craft room.  I just love her style - vintage, shabby chic, but with bright colors to fit her personality and match her blue-with-big-colored-polka-dots walls in her bedroom.

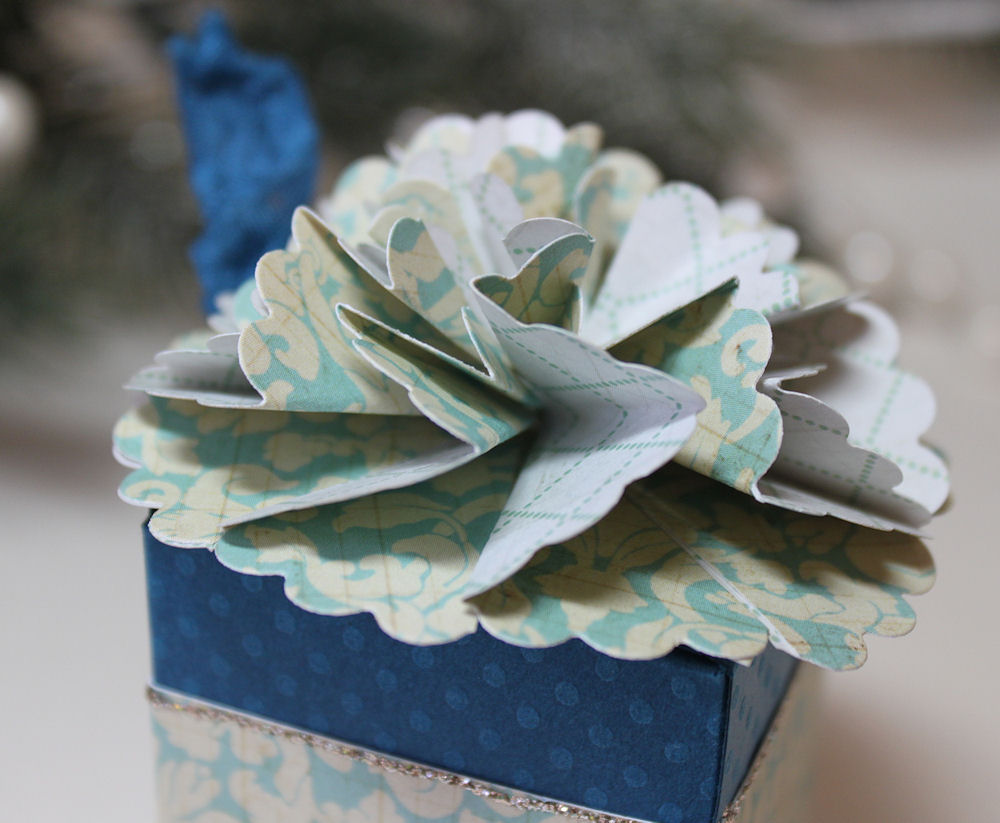
Some details, Meghan's first....
As soon as Meghan spied my Golden's gold paint, she had to use it!  Here, she has accented some of the images on some stamped tissue paper that she tore and gelled onto the painted canvas.  She also used a splatter technique with the gold.  A bit of Tim's tissue tape and some K and Co. keys keep the vintage vibe going.
Meghan is becoming a fan of anything French, so the chipboard Eiffel tower, spritzed with golden glimmer mist, was a natural choice for her.  More stamped tissue in the background, and a little bit of a resist, sprayed "breathless LOVE" panel behind the star.
Aren't all tween girls dreamers?  This stamp from Unity was a natural choice for her. ;)


I adored *this technique* that Donna demonstrated in her video.  I tore pieces of vintage sheet music, text, and patterned papers to create my background.  A bit of tinted gesso, then lots of different paints, stains, splatters, and crayons over the top.

I had found a vintage book of poetry that was written on in the margins.... in pencil.  When I adhered this page to my canvas using gel medium, the pencil writing turned purple!  Oh happy day - love when that kind of stuff happens!  A little birdy over the top of the poem (To the Skylark), spritzed with glimmer mist and outlined in Neo Color crayon.
And speaking of Caran D'Arche NeoColor II crayons..... I. am. in. love.  Oh! Yes!  I had purchased a few at Donna's studio just to try them and see if they were worth the considerable expense.  I fell for them - hard - and just bought a bunch more individual colors from Dick Blick (they were having a free shipping special, and they always have great prices).  I decided to buy them individually, rather than in a set, because I know that I love the soft muted tones rather than the brights.  Better to spend a little more and get exactly what I want.  Anyway, back to the canvas..... I stamped the peony onto pale pink tissue paper and adhered it to the canvas with gel medium.  I used Golden paint to paint in the stems and spritz on some brown speckles.  Then I went to work with my as-of-then very limited NeoColor crayon palette (I think I had 6 at the time).  A bit of brightening of the flower, some shading all around - so easy, so simple, so worth it (to me, anyway, tee hee)!

I hope you get time to play during this busy season - especially if you can play with family and friends!  We are switching gears for the long holiday weekend - it's volleyball 24/7, with my daughter in her first big tournament of the season.  I'm hoping to be able to get some downtime on the ol' iPad to vist all of your lovely blogs.  Until then.... Happy New Year!

Monday, December 19, 2011

Quickie Christmas Cards

In the craziness that leads up to the holidays, I found myself short a few Christmas cards.  Since the kids' sports schedules are still going strong (meaning I spend a lot of time at courts and rinks, sitting for 2 hours, which doesn't include the time needed for commuting), I am needing to make every minute 'til Christmas count.  So I decided that my little gluebook project had to make way for my Christmas card project.... the gluebook ingredients in my vintage train case were replaced with selected scraps of holiday paper, vintage sheet music, a single stamp, a pair of decorative scissors, two punches, and three inkpads (everything but the partridge in the pear tree, LOL).  Oh, and card bases and a glue stick, of course.  I also loaded up a little mini guillotine-style paper cutter.  I was all set to mass-produce a few cards. :)

I used a stamp from Stamp Francisco, and papers from a My Mind's Eye Lost and Found Christmas 6x6 pad, along with some scraps.  Once I got the general layout figured out, these were a snap to put together.  When I got them home, I added a little platinum Stickles (gotta have some bling for the holidays!).  Sorta kinda like gluebook pages on a 4 x 5 inch scale, LOL!  Here are a few others that haven't been sent yet.... all the same, but all a little different.


Hope you are all catching up on all of those holiday errands.  I'm still swamped.... looking forward to Christmas Eve, when all is quiet and we all just sit and enjoy family.  Happy Monday. :)

Thursday, December 15, 2011

Oxford Impressions - Christmas Wish

I was so excited recently when Suzanne of Oxford Impressions asked me to design with her new plate, Christmas Wishes.  This full stamp plate is filled with wintery goodness - Christmas and more!  As soon as I saw the Santa, I knew, for some reason, that I wanted to do him in blue.  This card uses the Santa, Post Card, December date, and snowflake stamps from the new set.  I stamped the Santa and colored him with Distress Inks, then cut him out - he's popped up on pop-dots.  The little postcard was simply made by stamping the sentiment, cutting out a rectangle and sanding the corners (so they wouldn't look so perfectly square and sharp), then using distress inks and some more stamps to fill in the rest.  I added a line of Christmas music from a vintage songbook, some seam binding, and some seriously distressed papers (some from Glitz's vintage blue line, and some of Tim Holtz's Core'dinations cardstock - sanded with sandpaper and distressed with his edge distress tool).

Here's another card, in the traditional Green and Red....

For this one, I once again cut out the main figure - she's adhered over the sleigh image.  I used a teensy holly image to stamp all around the edges, then colored in the berries where they showed.  The papers are from Lost and Found - my fave of the season!

And one more....
This one glitters in silver and gold, although it's hard to see in the picture.  The main image is mounted on a little tissue-paper-backed frame.  I had some gold tissue paper, but found that I couldn't cut it with my decorative edge scissors (not sharp enough, I suppose).  So I ran a rectangle of cardstock, about an inch bigger than I needed all around, through my Xyron sticker maker machine.  Then I carefully laid the sticky side of the cardstock down on the back side of the tissue paper (make sure it's smoothed out). It was then sturdy enough to cut with my deckle edge scissors.  The stars and snowflakes are stamped randomly and embossed with silver and gold.  I used a little glitter-covered silver star to accent the greeting.

There's still time to get those Christmas cards done!  If you need inspiration, you can check out the Gallery over at Oxford Impressions, too - with some seriously yummy vintage cards. :)

Wednesday, December 14, 2011

Gingersnap Creations Spicy Supply Challenge - Wax

The new Spicy Supply Challenge over at Gingersnap Creations is CG130: Wax.  Use beeswax or wax crayons or wax paper - anything wax-related, just use your imagination.  I decided to go with an oldie but goodie - the ol' tissue paper adhered with waxed paper onto a candle technique.  You can find a wonderful tutorial on Splitcoast Stampers *here*.  They say to use white tissue paper (which I did for the snowflakes), but you can also use colored tissue to add yet another twist.  Here, I wanted it to look like old parchment or bookplates with Santas printed in sepia.  So I simply stamped on a light kraft-colored tissue (sort of a shimmery champagne color that I got at Hallmark), cut out the Santas, and waxed them on first.  Then I stamped the snowflakes on white, waxed them on, and added a little bling to the centers.  This was very quick, very easy, and makes for a fun little hostess gift that you can do at the last minute.  These Santas are from Artistic Outpost and Victorian Trading Co. 

Here's the other side:
These Santas are from Stamp Francisco and Crafty Individuals.

Hope you find some time to play along! 

Sunday, December 11, 2011

7th Day of Whimsy

Well, the paint is still drying on my tin for the 6th Day of Whimsy, so I'm charging ahead with the 7th Day of Whimsy - A Frosted Snow Angel.  I didn't have any of these particular beautiful Paper Whimsy images, but I found something similar at the Graphics Fairy.  I added some vintage white velvet leaves as her wings, some vintage lace, a House of Three crystal bangle, and a Stampin' Up felt snowflake as her halo.  Such a fun project!

I have the whole family here at home again tomorrow, so may have to wait a bit before I disappear into my craft room again.  Hope everyone has a wonderful Monday!

Tuesday, December 6, 2011

Days of Whimsy 2 - 5

I spent the entire day crafting yesterday... it was heaven!  I wanted to catch up with Nancy Maxwell James' 12 Days of Whimsy, featuring the beautiful collage images of Paper Whimsy.  You can get all of the instructions on Nancy's blog, Sugar Lump Studios.  The banner above is the 2nd Day of Whimsy.  I've used Lost and Found Christmas papers for them all, and I am totally addicted to this vintage color scheme! (Just went and bought two more 6x6 tablets of the stuff.  Yes!).  All of these images are from Paper Whimsy.  Here they are individually:
"Merry" is cut from a vintage Little Women book, as is "Christmas" below.  I cut the banners using a Papertrey Ink die.
For the "Wishes", I stamped a Christmas sentiment on a border of the text from the book, so that it would have the same patina.  I finished these off with some Stickles (my favorite color - Platinum), some poinsettia flowers, bling, and vintage mother of pearl buttons.

Next up, Day 3 and an adorable natural batting mitten.  I loved this project, since it gave me a very good excuse to cut into a stash of delicate vintage lace.
The image (from Godrun Loennecken) was printed on sticky-back canvas and stitched in place.  I added a little plastic "thingy" LOL - the little white filigree flower is from some sort of broken necklace I found at a flea market.  Very fun to be able to use that, too!

Next, Day 4 (bet you didn't see that coming, LOL!) and a snowy tag.  This is once again a Paper Whimsy image, vintage lace, glittery snowflakes, mother of pearl... oh how I love these projects!

Finally, Day 5 - glittery snowflakes that I opted to create ornaments with, but you can also attach them to cards, as in the project shown on Nancy's blog.
These came together in a snap.  For the snowflake, I used an image printed on canvas, and some crepe paper that I had edged in platinum Stickles and gathered.  For the star, it's just an image printed on cardstock.  Soooo easy, so quick, such a great way to adorn a package. (P.S. I had found these ornaments on clearance last year at Michaels - 50 cents for a pack of 6 - they might be there again this year, I haven't checked.)

That's my catch-up post!  Today's project involves a decorated tin ornament.... don't know if I have a tin, so I'll have to get scrounging or get creative.  Will hopefully have that tomorrow. :)

Monday, December 5, 2011

Playing Along with 12 Days of Whimsy

I finally carved out some time, very late last night, to craft.  I have been dying to play along with Nancy Maxwell James and the 12 Days of Whimsy.  These are my projects for the First Day of Whimsy, Button Faeries - I love them!  My first two ornaments feature images from Paper Whimsy (you can find them Here and Here.) 
Then I thought, wouldn't it be fun to use vintage (or vintage-looking) family photos?  So here are two more Button Faeries, these featuring a vintage photo of my Aunt Betty, and a not-so-vintage photo of my daughter as a baby.  I took a color picture of her and played around in my photo editing software until I got her looking sufficiently vintage.  She didn't even recognize that it was her at first, LOL!
Nancy has provided gorgeous photos and wonderful instructions on her blog, Sugar Lump Studios.  I am off to make another project - these are right up my street, so to speak! :)

Thursday, December 1, 2011

Blue Gluebook Pages

I've been gluebooking in the car again, using up some scraps - hence the spring theme, so far from the holiday images I should be using, LOL!  I don't yet have many Christmas scraps accumulated, so I'm still using my leftovers from the summer.  The digital image of the girl on the right is from Lisa's Altered Art; the stamp on the left is from Artistic Outpost.  (Sorry for the unconventional "holder" - I just couldn't get the thing to lie flat.)

I'm hoping to play along with Tim's 12 Tags of Christmas, but it won't be for a few days.... we've got band concerts and Christmas piano recitals to attend to first.  Hope you're finding time for some holiday crafting. :)

Tuesday, November 29, 2011

Rogue Redhead + Technique Junkies Blog Hop!


Welcome to Stop #5 on the joint Rogue Redhead and Technique Junkies Blog Hop! We are all having loads of fun with the new Technique Junkies' 3D and Fun Folds CD! If you have been following along already you should have come from Beverly G.  If you are only starting here, please head back to the Technique Junkie Newsletter Blog and go from there.

If you have just discovered the blog hop, let me give you some background....
The Technique Junkies team has joined us to showcase the numerous great techniques on this new CD. As you may know, the Technique Junkies Newsletter has been publishing rubber stamping technique tutorials since 2002. The 3D and Fun Folds CD contains 70 step-by-step technique tutorials in PDF format – perfect dimensions, perfect directions and great pictures for every step. Visit www.techniquejunkies.com for more details about the CD and the Technique Junkie Newsletter.

A fantastic group of design team members from both Rogue Redhead Designs and the Technique Junkie Newsletter have helped put together this fabulous Blog Hop to kick off the 3D and Fun Folds CD. Not only are the talented Technique Junkies team hopping with the Rogue Crew today, they started hopping yesterday with Classy Cards N' Such and will be hopping again all the way through Friday one day each with PaperTemptress, Mark's Finest Papers, and Sweet n' Sassy Stamps. Check the The Technique Junkie Newsletter Blog for more details.

After visiting me, you can head off to see Holly Brown at Glitter, Stamps and Ink (Oh My) for your next stop.

For my first project, I couldn't resist making an adorable Technique Junkies "Goodie Purse."  This is the perfect little "handbag" for a gift card!  I used some double-sided Christmas papers, decorative brads, and a stylish Rogue Redhead Designs Milliner Misses gal and sentiment for the gift tag.


Here's a photo of a gift card perfectly nestled inside.  I will give this little Goodie Purse to my daughter with a gift card to one of her favorite mall haunts (Delia's, perhaps!).


Next up, a pretty Scallop Flower Box, decorated with a cute snow couple from Rogue Redhead's Candy Kisses plate.


The instructions for this project include the how-to's for this fabulous little scalloped flower embellishment.


I can see making these to adorn lots of small gifts.  And the box is the perfect size for stocking stuffers... perhaps filled with some Candy Kisses or other sweet treats. :)

I had tons of fun making these Technique Junkies projects, and just in time for the holidays.  I hope you have fun hopping along to the rest of the design team blogs.

If you get lost along the way, here's the whole list of hop stops for your convenience.

1. The Technique Junkie Newsletter Blog

2. Rogue Redhead Designs Blog

3. Jackie Kalchert

4. Beverly G., Rogue Crew

5. Jean Franks Beck, Rogue Crew - that's me!

6. Holly Brown

7. Jane Bosi

8. Laura Liddell, Rogue Crew

9. Joanne Wardle, Rogue Crew

10. Chris Dickinson

11. Stephanie Severin, Rogue Crew

12. Sharon Briss, Chief Rogue

13. Pat Huntoon

Thanks for stopping by!  And one last, very important, thing.....

On Saturday, December 3, Pat from the Technique Junkie Newsletter will announce the winners from each company. Be sure to hop along on each day! There will be FIVE WINNERS! On Monday, December 5th, Pat will announce ONE LUCKY WINNER with a GRAND PRIZE with a bundle of prizes from all of the participating businesses.

You won't want to miss any stops along the way – in order to win you will need to comment on everyone’s blog AND Pat Huntoon's blog. There will be an additional chance to win by playing along in her Blog Hop!

Friday, November 25, 2011

A Masculine Christmas Card with Rogue Redhead Designs

Making some headway on my Christmas cards, this time with some Rogue Redhead Designs stamps.  You can find all of the details over at the Rogue Redhead Designs blog.  Plus, find out about some really great deals on all of their fabulous stamps over at the shop.  (Just a little enabling for your Black Friday pleasure, LOL!)  Hope everyone has a wonderful weekend!

Monday, November 21, 2011

CHF Grand Re-Opening Blog Hop Winner!

We have a winner!  I've used Random.org to choose a winner from the 92 comments received in the first 24 hours of the blog hop.....

The winner is #71, who is.....

Monika/Buzsy said...
Fabulous projects Jean. Love the digi images, especially the vintage palace! The coloring is so pretty!
Congratulations, Monika!  Please email me (by clicking on the little bluebird in my sidebar) with your contact information, and I will pass it on to Tanya at CHF!

I want to thank everyone for coming around for the Cornish Heritage Farms Grand Re-Opening blog hop!  I appreciate all of your lovely comments. :)

Saturday, November 19, 2011

Cornish Heritage Farms Grand Opening Blog Hop!

Welcome!  I'm so excited to be part of the Cornish Heritage Farms Grand Re-Opening!   Today I'm playing with some of the fabulous new digital images available on the Cornish Heritage Farms online site.  For my Thanksgiving card, I've mixed it up a bit and printed a background image (Fall Harvest) onto some patterned paper, the sentiment onto cream cardstock, and the Boy with Pumpkin onto white cardstock.  I colored the boy with Copics, cut him out, and adhered him into the center of the background scene.  A bit of distressing, a felt leaf, and some pleated paper strips finish it off.


Next up, I decided to play with a few of the cute Pumpkin images - I think they're just perfect for place cards for the table.  I layered them with some felt leaves and a few coordinating buttons.  The whole little embellishment sits atop a place card made from corrugated cardboard.  Now, so that I don't have to do this all over again next year, I made sure to stick the names on with just a little temporary adhesive - that way I can change them out, depending on who's at the table next year. ;)


I love playing with this series of vintage palace images (you can see the first one - Palace #2 - in my previous blog post).  As before, I printed out Palace #1 on a subtly patterned Prima script paper and colored with Prismacolor pencils.  I changed up the color scheme this time, but the idea is still the same, using Graphic 45 patterned papers, a rose diecut, and a tiny crown bottlecap.


Thanks for visiting and having a peek at some of the over 500 digital images now available on the Cornish Heritage Farms website.  And for those of you who love rubber (like me!), over the coming weeks there will also be a special rubber stamp section on the website, too - featuring some old favorites like The Rummage Bin, Thomas Kinkade, and the wonderful backgrounders!

So, want a chance to win a Cornish Heritage Farms gift certificate? Just visit each of our blog hop sites (see the list below). Leave a comment on each site before you hop to the next site.  Each DT member will randomly draw a name from the comments left in the first 24 hours of the hop.  That means you have 8 different chances of winning!

Good luck and Happy Hopping!


Jean Franks Beck - (that's me!)


Thursday, November 17, 2011

Cornish Heritage Farms Sneak Peek

So apparently there are these things called "digital stamps".  No really, there are!  And they are just like stamped images, only you print them on your own printer.  Yes!  It's true!  Onto any paper you'd like.  Even Patterned Paper.  ROFL!!!

Okay, if you've visited here often, you know I am a dinosaur when it comes to digital.  Stubbornly avoiding the bandwagon.  And when I found out that Stamper's Ink was going to be offering lots and lots of Cornish Heritage Farms *digital* stamps, I was, shall we say, "tentative." :)  I love me some rubber.  However.... I am now hooked.

No, I'm not giving up rubber, no how, no way.  But I had fun with this!!!  I am definitely adding digital to my repertoire.  Especially with these yummy new vintage images from Stamper's Ink, the new home of CHF.  This card came together in a snap.  I printed the Palace #2 image onto some Prima script patterned paper and softly colored it with Prismacolor pencils.  Distressed the edges a bit (with Gathered Twig), framed it up on some cardstock, and added it to another patterned paper background, this one from Webster's Pages.  All it needed was a special little embellishment - some big box petals, some vintage lace, and a vintage mother-of-pearl button.  That's it! Done!  Oh yeah, I'm feelin' it, LOL!  I can see how this could fit in for me, tee hee.

So now that I'm at least friends with the digital bandwagon, I hope you can join me and the rest of the CHF team on Saturday, November 19th.  We are going to officially launch Stamper's Ink's new Cornish Heritage Farms website, filled with lots of never-before-seen CHF images - the ones that hadn't made it to primetime yet.  (Along with a few old favorites coming soon.)  If you followed CHF before, there will be lots of familiar blogs on the hop, along with some new ones.  And I'm told that eventually there will be rubber, too..... the best of both worlds. ;)  See ya then!  (If you want a bit more of a peek, there are a couple of images available now - but most won't appear until the big day.)

Friday, November 11, 2011

Visions of Sugarplums with Rogue Redhead Designs

A "sweet" little card I made for the Rogue Redhead Designs blog today.  You can check it out *here* and get all the deets.

Happy Veteran's Day, Remembrance Day, Armistice Day to all - thank you to the service men and women who have risked or given their lives so that we may be free.  My dad was a teenager in the US Navy during WWII.  Now my cousin's son serves in Afghanistan.  We all know someone.... take a moment to give thanks. :)

Wednesday, November 9, 2011

Glue Book on the Go

Well, I am not getting into my craft room nearly as much as I would like, and when I'm in there, I'm cleaning!  Luckily, I still have my vintage train trunk full of scraps that I take with me in the car.  I tend to work with nature themes a lot, and so the next few pages I decided to try to combine a bunch of this sort of image.  For this layout, I also happened upon a few scraps that fit together beautifully - completely serendipitously.  It's so fun when you find the perfect combination in your stash!
For the right-hand side of the layout, I discovered two clock images that fit together rather nicely.  I used them to highlight the fairy image (a leftover if a Craft Individuals image stamped on a glimmer misted background).

On the left side, I found two butterfly images that fit together - a stamped image and an image on a scrap of patterned paper.

Another couple of nature themed pages - these with a "field notes" kind of a feel.  The large bird image is from an old Christmas season bag from Pottery Barn.


Finally, one last Halloween page that I forgot to post.  I love this one, because I happened to find a piece of vintage sheet music that had the lyrics "name a spell" on them.... a perfectly witchy little tune, I think. ;)
That's all for now.  Got to get cleaning!